How to Implement a School-Wide Approach to Self-Regulation
As a school counselor, I've found self-regulation to be a core part of my counseling program. My principal introduced it to me during my first year of counseling and I have used it to help individuals, small groups, and whole classes every year since then. There seems to be an increasing need for this type of skill set as we see more and more dysregulated students enter our school systems each year. Tackling this issue with a preventative, proactive approach is the best way to teach all students this fundamental life skill.
What is self-regulation?
Self-regulation, made wildly popular in the education world by Leah Kuypers' The Zones of Regulation, is a system where students can observe and identify their emotional state and communicate which strategies they need to get back to their ideal state for learning.
Why use self-regulation?
Self-regulation is so powerful at the elementary level because it gives students a simple and visual way to communicate how they are feeling and what they need to simply feel better. But students K-12 (and even adults!) can benefit from this emotional regulation system.

Establishing a Common Language to Implement Self-Regulation School-Wide
Simplifying this concept into four easy to learn colors is a great way to start a school-wide approach to self-regulation. A common language gets everyone on board! Once all staff and students are familiar with the colors, which emotions they represent, how they present in behaviors, and which strategies are best to use, students can feel empowered to use the language themselves! Establishing a common language isn't easy, but it is so worth it! To get things started you may want to hold a training for teachers and staff during a staff meeting or PD.
At my previous school, teachers would introduce the topic, I would expand deeper during counseling sessions, and it would be reinforced by the principal and recess staff. If you send home some information you can potentially even get parents involved! Currently, I am a one-woman show in implementing self-regulation since it is my first year and my school wasn't using it before. I hope to leave them with some systems in place, such as the ones I am outlining in this blog post!
What it looks like in action
A student already knows what the self-regulation colors signify from his teacher's introduction. So when he is angry at recess and reacts by hitting another child, the recess duty-person can ask him what Zone he is in. He may answer 'red'. Then when talking to the principal about the consequences of his actions, the principal reminds him that it is okay to feel angry or 'red' but that it is not okay to hurt others. Later he would meet with you, the school counselor, to review coping strategies to use next time he is in the 'red zone'. This is a restorative approach that holds the student accountable while supporting him.
Using Visuals to Implement Self-Regulation School-Wide
You can use visuals to help students and staff learn and reinforce the self-regulation basics. Self-regulation is perfect for visuals because it focuses on 4 main colors (blue, green, yellow, red).
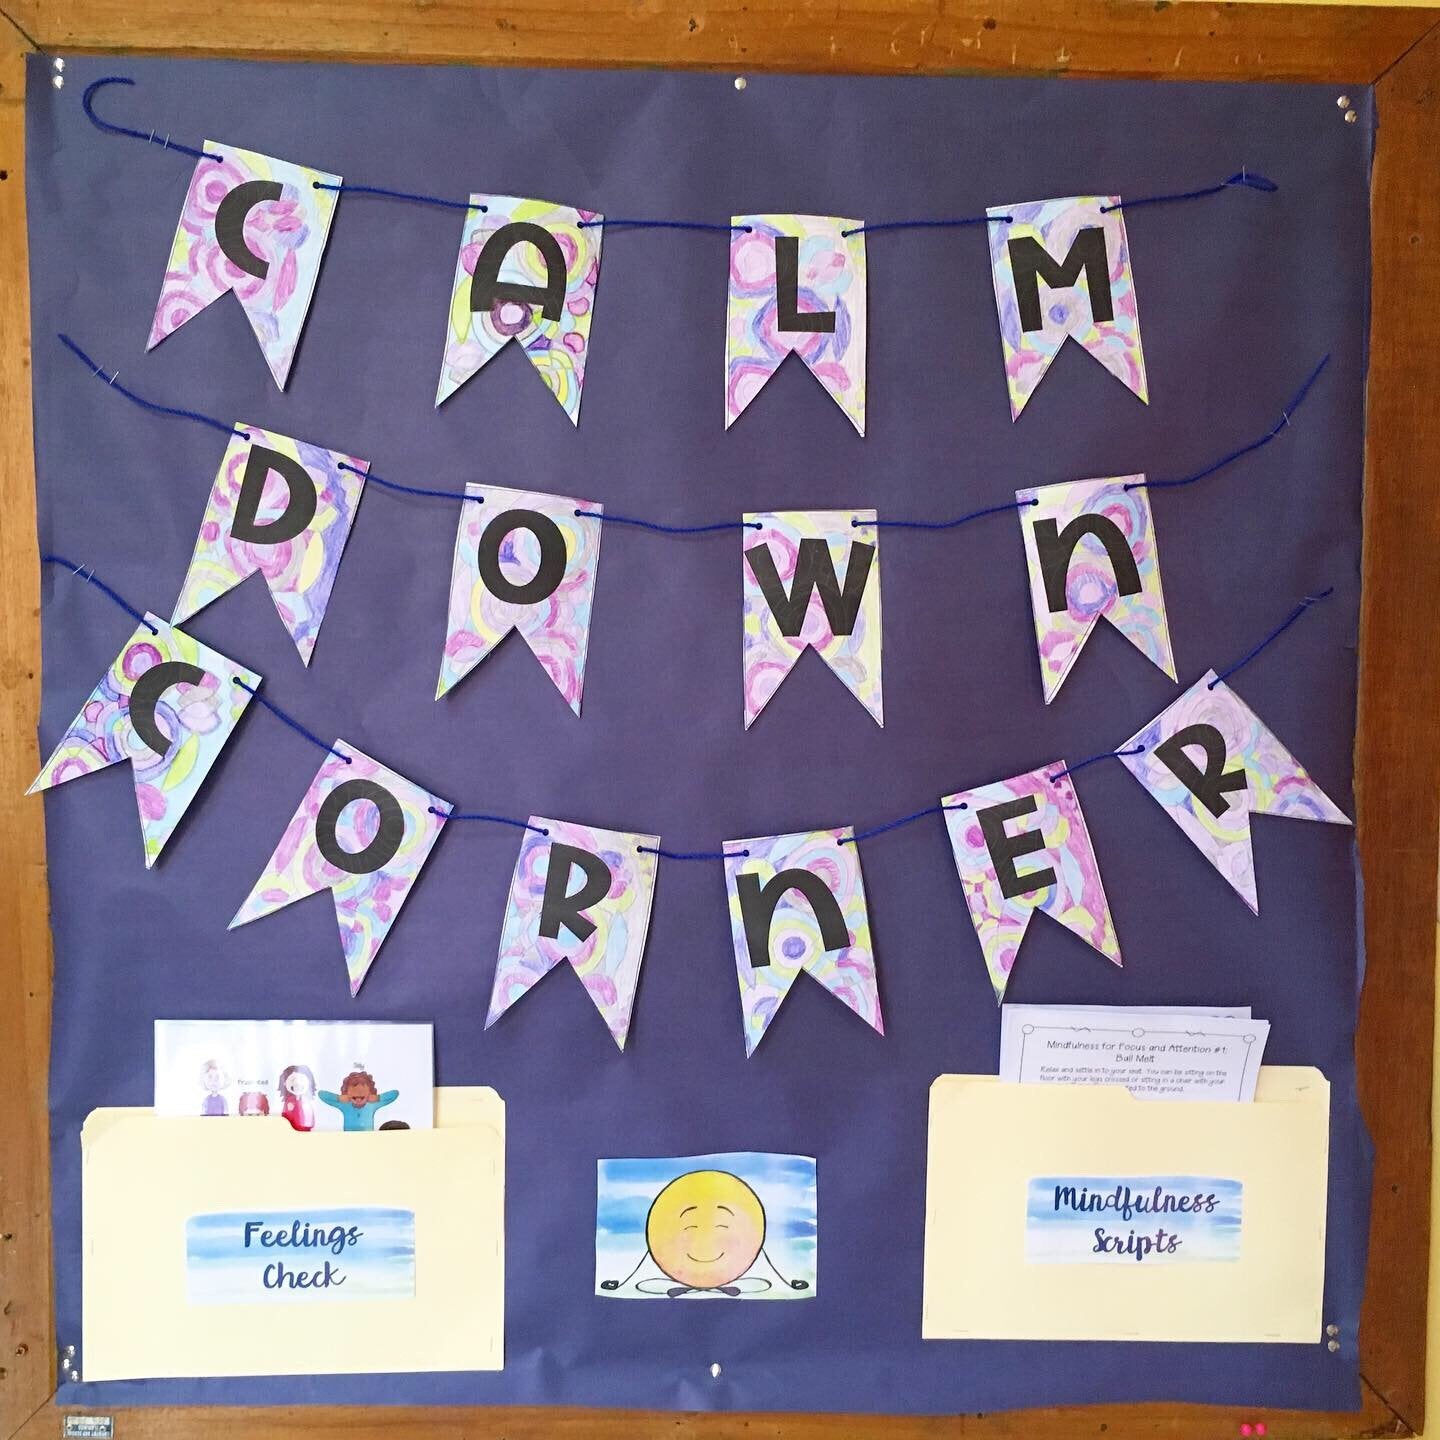
Use Bulletin Boards and Class Posters
Simple yet so effective. Students walk by bulletin boards in the hall every single day so what better place to promote self-regulation strategies! Hang posters showing the four colors along with what they look like and possible coping strategies to try. Or try creating a self-regulation station where students can check in on how they are feeling. If you could get teachers on board to hang these in the classroom it would be huge! It is a check-in station where students move their clip to show which zone they are in. Check out my bulletin board kit here.

Bulletin boards and posters also provide an instant redirect for when a student is in crisis. If a student is in the red zone, the teacher can point to the nearby poster and help them select a coping strategy to try. This gets teachers more comfortable with using self-regulation and allows hands-on opportunities to practice what you may have presented in a staff meeting.
Constant visual reminders paired with a common language are an extremely efficient way to get students and staff familiar with self-regulation.
Using Classroom Calm Down Corners to Implement Self-Regulation School-Wide
Calm down corners are a great way to help students practice self-regulating in the classroom.
What is a calm down corner?
If every classroom could have a calm down corner, that would be a dream! A calm down corner is exactly what it sounds like, a safe space in a corner of a classroom where students can go when they feel like they are losing control. Ideally, they are self-aware and recognize that they need a break. They then leave their desk to go to the calm down corner. After they take a few moments to calm down by using coping strategies (take deep breaths, journal, play with a squishy, etc) they return to their seat ready to learn with little or no disruption to the rest of the class! Okay, I said ideally. In reality, it may look like a student starting to have a meltdown and the teacher asking them to take a break in the calm down corner. This works too and hopefully still yields the desired outcome.

What do you need to have in a calm down corner?
-
Visuals: As I discussed earlier, visuals are huge! Hang a few posters or signs explaining the different zones, how students may be feeling, and possible tools to calm down.
-
Flexible Seating: A nice rug, sequin pillows, and some bean bags are ideal, but you can make do with what you have. The main thing is that you want to distinguish the area from the rest of the classroom so it is clear where it is and what it is intended for.
-
Calm-down toolbox: A "toolbox" is a great place to keep sensory items, fidgets, glitter bottles, etc. It can be as simple as a plastic tub. Basically you want the contents to be tactile resources to help students calm down.
-
Other items in a calm down corner could include noise-canceling headphones, calm down coloring sheets, or behavior reflection think sheets.
Why have a calm down corner?
Instead of sending students OUT of the classroom when they are in crisis/misbehaving/losing control etc, you keep them IN the classroom. Remember behavior is one way for students to communicate with us. You want to promote a restorative justice model rather than a punitive one. This being said, you should be mindful of the tools you put in the toolbox. Avoid toys with no sensory purpose and be on the lookout for kids abusing the system. You may get teacher push-back on this, more on that below.

How to get teachers on board?
The number one push-back I hear from teachers is that the calm-down corner will be a distraction and that students will take advantage of it to get out of doing work. This is a valid concern and it may be true...at first! I find that calm-down corners lose their novelty after a while and most kids are compassionate toward their classmates. If they see a fellow student having a hard time, they know that he needs to use the calm-down corner and that it is not a play area. You can start by having a small group of teachers test it out in their classrooms to get feedback before implementing it school-wide.
Using Multi-Tiered Systems of Support to Implement Self-Regulation School-Wide
I've shared ways to use a common language, visuals, and calm-down corners to get everyone at school on board with self-regulation, but let's talk about what you're really passionate about... counseling! By implementing the three tiers of school counseling we can reach students at every level.
How to Reach Students Using Tier 1 Interventions
Like the other methods I've mentioned, tier 1 interventions are school-wide and truly help all students. This can be done through universal core instruction aka classroom guidance lessons. I love to do a classroom guidance lesson introducing self-regulation and the different color zones at the beginning of the year. This reinforces the use of a common language early on.

An easy way to do a class lesson would be to show a PowerPoint with some images of the different zone colors along with associated behaviors and possible coping skills. Try showing a video and having kids identify when the character is changing zones. I like to use this clip from Inside Out. Want a more low-tech lesson? Divide the class into 4 groups and assign them a color zone. Give them some information about that color (behaviors, actions, coping skills, etc) and have them act it out or present it to the rest of the class.
How to Reach Students Using Tier 2 Interventions

If you receive referrals from parents or teachers regarding students who need further support with self-regulation, put together a small group. Small groups are a great way to get kids talking which helps them verbally process their actions and help one another identify solutions.
Try this fun and easy game: Use M&Ms or Skittles and keep only the red, blue, green, and yellow ones. Pour out a few pieces in front of each student. For the first round, students take turns sharing a time they felt their candy colors. For example, if they have two green pieces and one red piece they will share two times they felt focused and ready to learn, and one time they felt angry or upset. For the second round, pour out 3 more pieces. This time students share how they reacted per each color Zone and identify a positive coping strategy. When finished, enjoy the treats!
Looking for an entire self-regulation group curriculum? Check out Ready to Regulate.
How to Reach Students Using Tier 3 Interventions
Have a student who needs more intensive help than a small group can provide? Or perhaps you don't have enough students to form a small group. Meeting with students at the individual level is a great way to go in-depth with self-regulation and to make sure they are not only understanding the basics, but are practicing it daily as a way to manage their emotions and behaviors.


For these one-on-one sessions, I like to use a journal with students where they can track their daily, weekly, and monthly changes in their self-regulation. They can also use it to write about times they've experienced the different color zones and how they handled it plus identify possible coping strategies for the future. Need a template to go off of? This is the one I use.. For younger kiddos, try establishing a self-monitoring system like these name tags that they can keep on their desk to communicate how they are feeling to their teacher.


For more ideas on how to specifically use The Zones of Regulation in School Counseling, read this blog post.
Are you motivated to get your entire school on board with self-regulation now? What strategy are you going to implement first?
This post contains affiliate links.

SHARE: